Create a table using Frontpage Express
Step 1: click on Start , then go to program, click on Frontpage Express
Step 2: click on Table button, go to Inset table
Step 3: then, you will have multiple choices for your table (like rows and columns....)
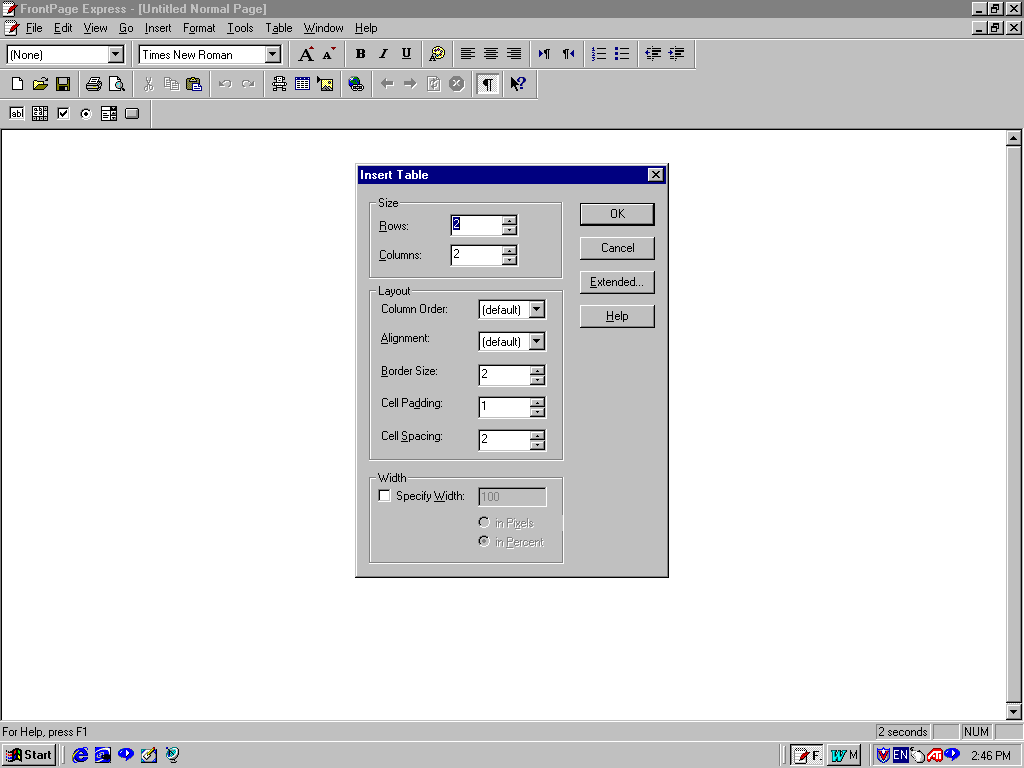
Step 4: In this example, we would like to set row to 1 , column to 2, and special width to
400. Then , you will see this graph:

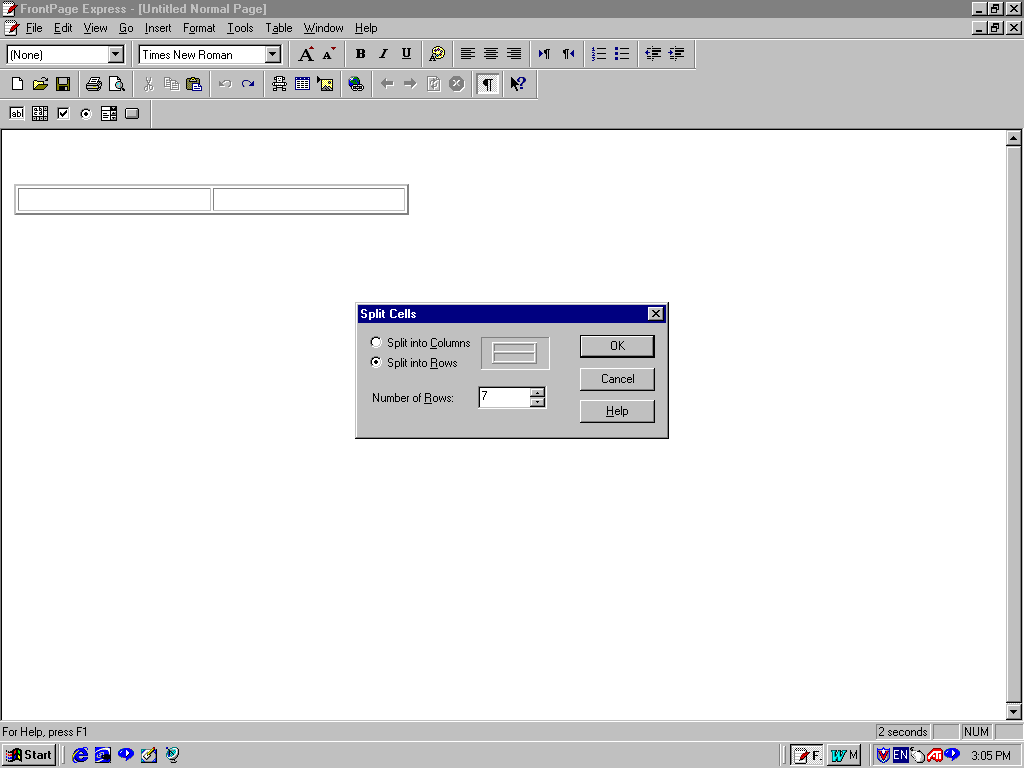
Step 5: Let us put the cursor in the right row, we are going to split this row into seven
cells that will have different colors.
Using Split Cells ( you can find this function in table button ) to divide you single
cell to 7 rows. See, the default function is Split in columns.
I choose the second function (Split into Rows), the Number of Rows is 7, then
click OK
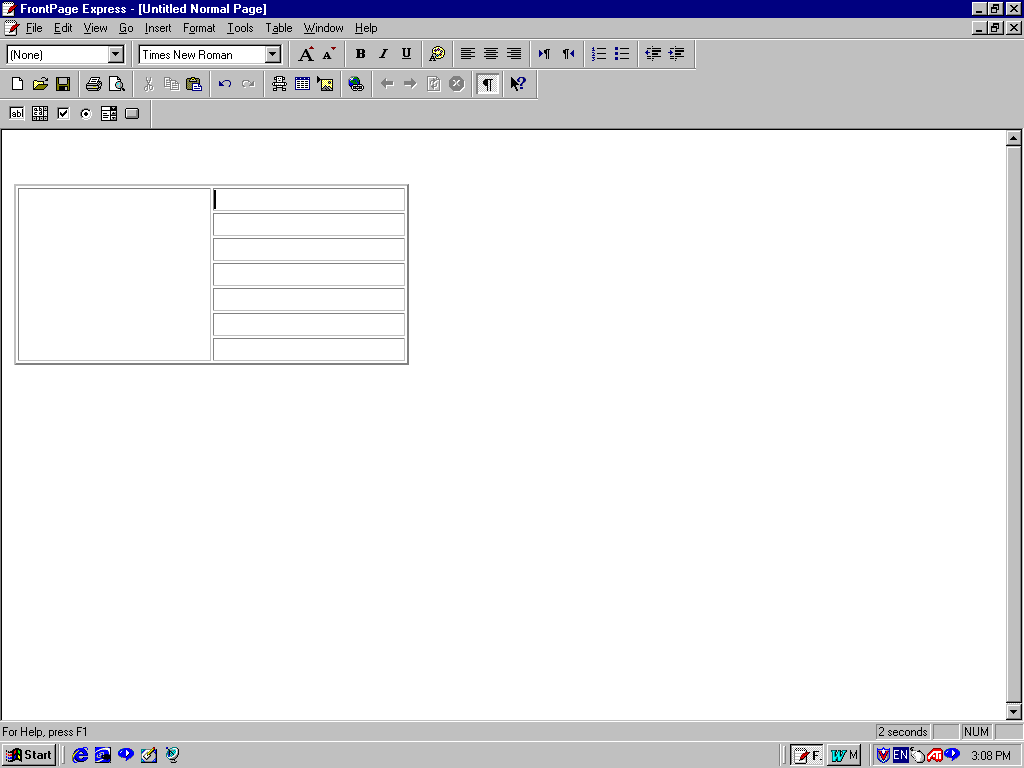
Here it is, we got it :
OOPS! this table should be like this:
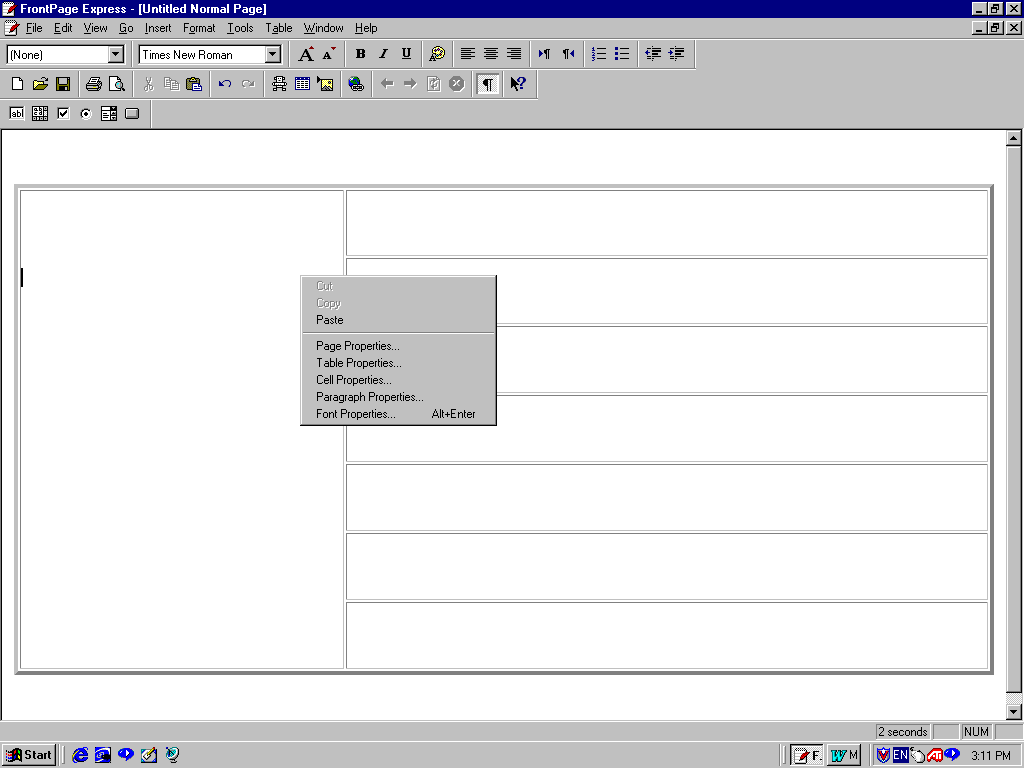
If you want to change the width of this table , all you need to do is to right click on your
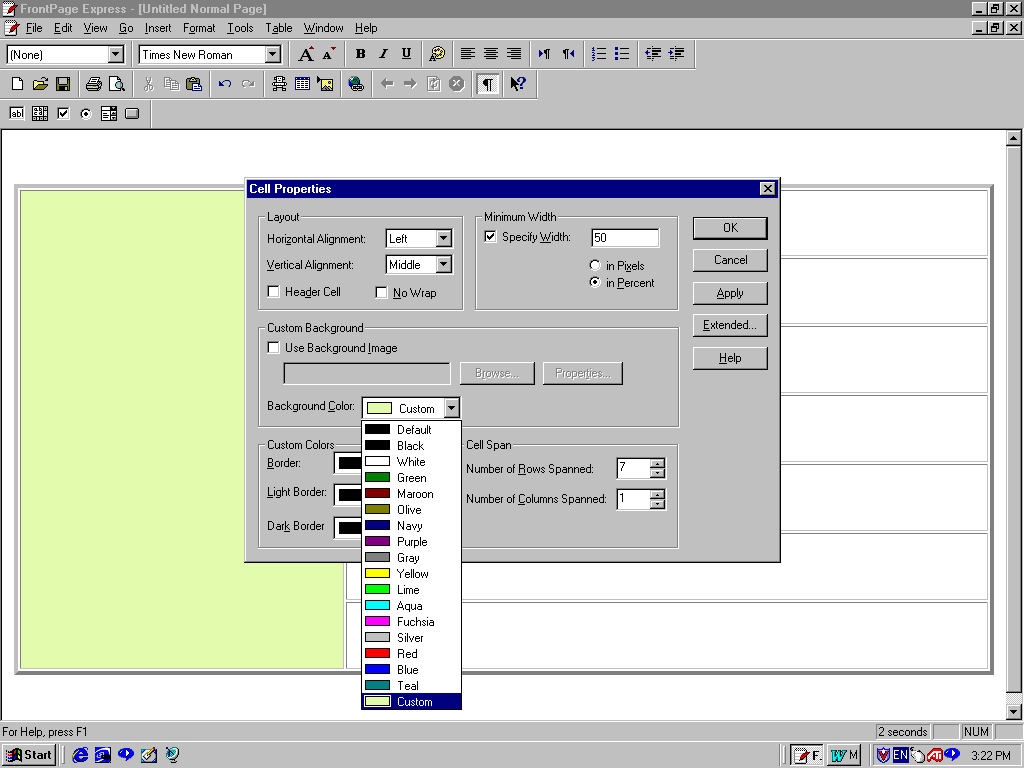
mouse (be sure your cursor on your table area), go to Cell properties and find the Minimum width for your table.
Note, if you just want to change the heigth of your table, you don’t need to click on your
mouse, and just move the cursor down on your table. That’s it!! (easy!)
Anyway, you can use other properties like table properties to change other information on your table.
Now, our table is bigger. (it's not very clear here, sorry about that! )
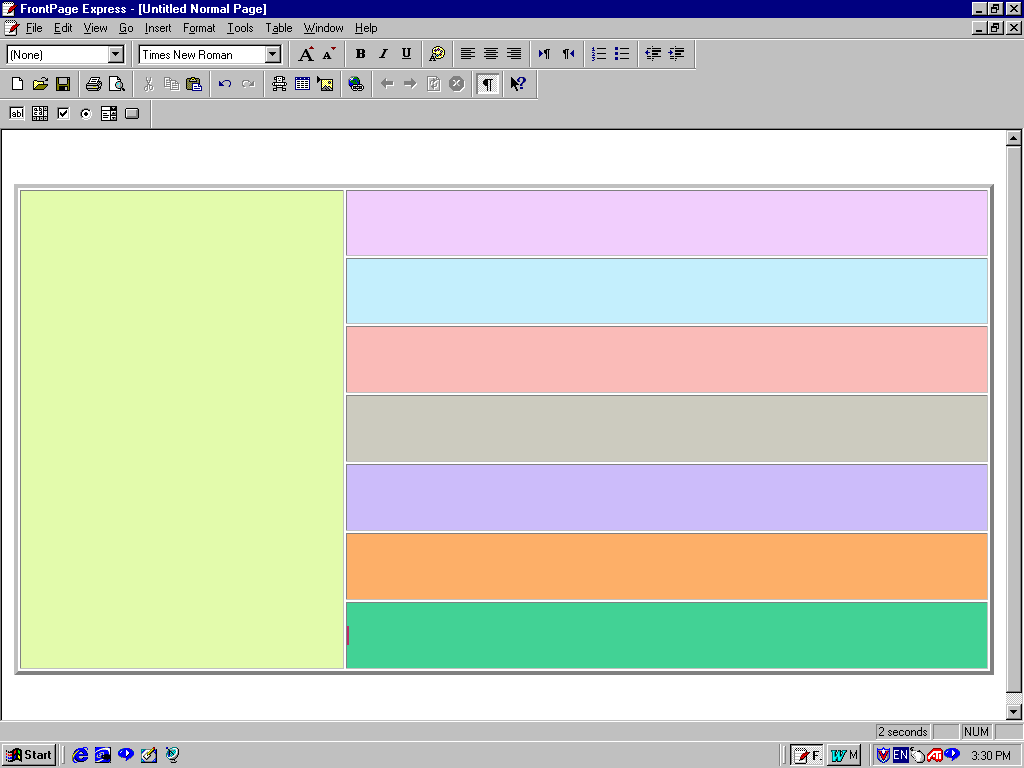
Step 6 : Here we go, Now I am going to add some colors to these cells:
We are still using Cell properties and this time I use Background Color and go through all indexes and
find the color we like. Then click OK, If your cursor is in the left side, then that field will
have a color you choose:
It is a nice table , isn’t it!