How to use scanner in room 463
Step1: Open the cover, put the picture or paper in scanner (face down), then close the cover.
Step 2: Go to "start" -->"programs"--> "HP Scan Jet Software"--> "HP PrecisionScan Pro",
click it. "HP PrecisionScan Pro window" will pop up.
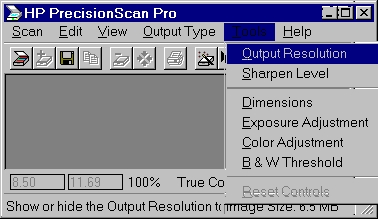
Step 3: Set output resolution. Select "Tools" in menu bar, and then find "Output Resolution"
When you selected it, a small window will pop up, then you can select resolution you want.
(Larger number means better resolution, but it will need more memory space. )
Also, you can set other properties that you want to make changes .
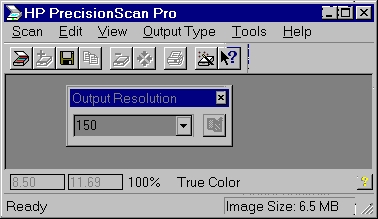
Step 4: Set output type. Click "Output type", and then find the type you want. Generally,
we use True Color
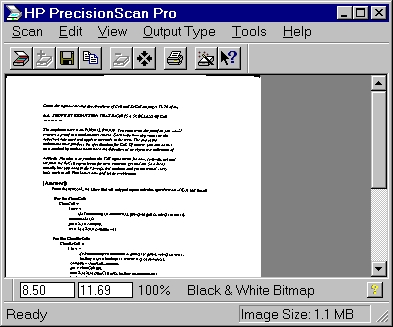
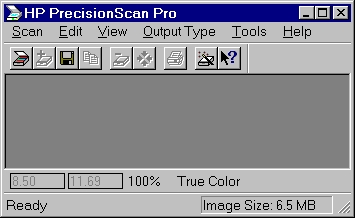
Step 5: Clicking on, scanner will scan your stuff in. The result will look like this.
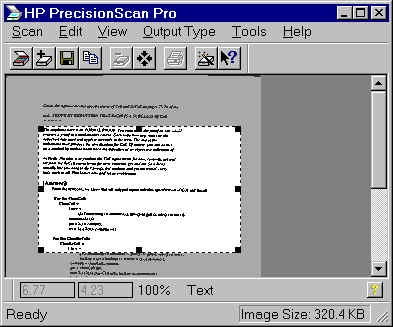
Step 6: Select the part you want to keep. You just need to put the cursor on the corner of
the part and press the left key of the mouse then drag it. Now, it looks like this:
Step7: By using,you can enlarge the part you select.
Step 8: Now, you can set the size of text through the "final width" and "final height"
windows lie on the bottom of the main window(see above picture). This
will be the final result appearing in your saved or printed file. After resetting, you have to useagain.
When you save files,you should consider the image size which appears on the bottom of
the main window.
Step 9: After all, you can save the file to your folder or print it out by pressing "scan" in
menu bar and selecting proper function.