There are times when the order of your data is important. Consider a grade book spreadsheet an instructor might keep. When entering grades the best order for the student data will most likely be by last name so the instructor can locate the correct row to enter the student's score. After all the grades have been entered, it might be interesting to see the student records sorted by GPA. Microsoft Excel provides the capability to sort the rows (and columns) in a spreadsheet. You can control the sort order (ascending or descending) and how much of a row is sorted (all or the highlighted portion). The rest of this objective looks at each step in the process. At the end of this objective an avi movie demonstrates a simple example. |
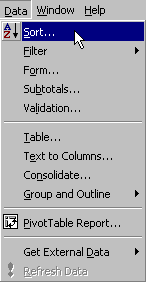
The Sort... command is available from the Data menu. To sort a group of rows in a spreadsheet:
Only the data in the cells in the selected region will be sorted. Data in the cells outside of the selected region will not change. You are not so much sorting rows in the spreadsheet as you are sorting rows in the selected region. If you select the selected region will be expanded to include the adjacent cells that have data. For more information see the related concept.
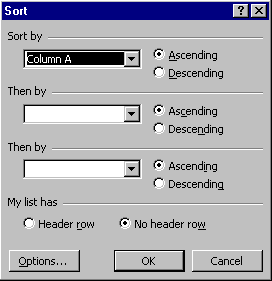
Here you can control the order (ascending or descending) and the Sort By column. You may also enter a second column to sort on. This option would be useful if, for example, you wanted to sort first by class rank (Freshman, Sophomore, etc.) and then by GPA. If the region you highlighted in Step 1 contains a header in the first row you will also need to select the Header row radio button.
Play the avi movie below to see a simple example of sorting within a spreadsheet.
|
|
Copyright 1997 by the Curators of the University of Missouri |